For the last 30 years, the Bite of Seattle has been one of the biggest festivals in the Pacific Northwest. In 2003, there were 60 restaurants participating with over 450,000 visitors. That is a LOT of foot traffic!
The Bite of Seattle is by far my absolute favorite festival in the Pacific Northwest. This year will be my third year in a row. One of my favorite parts of it is The Bite Cooks event!
The Bite Cooks! is an interactive and high energy live cooking entertainment showcase located on the Fisher rooftop for everyone to enjoy. Participants include some of Seattle’s finest chefs and local culinary experts who will spice up the stage with creative programming segments and cooking demonstrations. Local chefs will compete in a Bite Cook Off!, where they will be given three mystery ingredients, a small pantry of basic cooking staples and leave it up to the audience to judge there final entrée. The winner will be crowned The Bite Cooks Master! All demonstrations will be done on a fully-equipped stage provided by Viking. Mmm, Viking.
They have recorded this event indoors for the last few years, though this year they are going outdoors. I hope the weather cooperates!
Over the last few years, I've had several friends tell me "You should have your own cooking show!"
Alrighty, friends: now it's time to put your money where your mouth is. Well, actually it's time to put your votes (via mouse-clicking) where your mouth is!
This year, for the second year in a row, The Bite Cooks is holding a home video contest. Home chefs are invited to prepare a recipe that represents "Fresh Northwest" cuisine, and demonstrate the recipe in a 20 minute video. The winner will receive $100 in "Bite Bucks" certificates and $350 worth of Viking kitchenware. Mmm, Viking. Beyond that, the winner gets 20 minutes of fame (albeit on local tv ... through Comcast) to demonstrate their recipe with Thierry Rautureau.
I was not aware of this contest last year, but I am totally participating this year! I am super excited to submit my video! :) In case you can't tell, I love learning and sharing knowledge with others - especially when it comes to food!
Now, this is the part where I must shamlessly ask my friends to get out there and vote for my video! Pretty please? Sorry for the low production value of it. What can I say? I'm more of a videographer than a chef!
Here is the link to vote for my video. Please feel free to forward this to your friends and get the word out. Even if people do not want to vote, I at least hope they can learn something and enjoy the video!
I've sort of racked my brain to select a recipe to submit to the contest, and I have put a LOT of work into this video. I have plenty of great recipes to submit, though they might not all work well for a 20 minute segment. Plus they don't all fit with the "Fresh Northwest" theme since I'm not originally from the Northwest. Barbecue contest? Oh yes! Tex-Mex cuisine contest? The judges in this region wouldn't know what hit them! Baking competition? The fat kid within me squeals with delight! Recipes using bacon? Oh it would be ON! Northwest (summer) cuisine? Oh, hrm... Yeah, it was difficult, but I think I've picked a winner. I hope the judges think so too!
I recently sent a very dear friend the most glorious gift anyone could possibly send: the gift ... of pork. *cue the angels standing below the Salumi's flag, singing an aria chorus as they look up into the heavens*
Of course this friend doesn't truly know how glorious this gift is just yet. You see, I sent this salami chub to a friend in Texas. She has only tried salami from the local grocery store chain called H-E-B in Texas. Obviously this had to be remedied! Don't get me wrong, I still love H-E-B (and miss that place immensely!). They're just not known for their quality salami. Now that I think about it, I'm not sure if I did her a true "favor" since she will be forever spoiled!
So she received her chub of Salumi's DaVino salami in the mail yesterday, and she sent me a message saying "It smells wonderful. Now what to do with it?!?"
We-heh-heh-hell then. First of all, the best thing to do with a perfect artisan salami chub is to cut it with a meat slicer. If you don't have one, call around to your local deli or butcher and ask if they will cut it for you. Some places will charge a nominal fee - $.50 or so - to slice meat. You want to slice it very thin - thin enough where you can sort of see through it and you won't have to really bite down your teeth to cut through it. You don't want it sliced so thinly that your slicer isn't able to capture a fully-round circle with it. My slicer will do that with the lowest setting sometimes. That's right, folks, I have a meat slicer in my kitchen. I'm not even sorry. I included a link for it in my widget below in case anyone is interested.
You can create a sandwich just like Salumi's would! You can use sticcole or giuseppe bread (think: ciabatta bread). Add some olive oil with some finely minced garlic as a base to the bread, add some olive tapenade, provolone cheese, lots of salami (maybe about 2 layers of very thinly sliced salami), some grilled onions and Italian peppers (pepperoncini's if you like them).
I would also strongly recommend putting the salami on a pizza. My personal favorite combination is pepperoni, white onions, and some Italian sausage on it. Need specifics?
Fine, you twisted my arm. I am hereby giving you my pizza crust recipe. That's right, my very own first recipe that I am sharing on this blog. I am making blog history today! Of course I reserve the right to perfect it and not tell you how I've tweaked it. You get what you pay for, folks! :)
Larena's deep dish pizza dough
1 1/2 cups of warm water (105-115 degrees)
1 package of active dry yeast, or 2 1/4 teaspoons if you use yeast from the jar
2 Tbsp olive oil
2 teaspoons of Kosher salt
1 teaspoon of sugar
3 1/2 cups of bread flour
extra olive oil for the baking pan
In a large bowl (preferably a KitchenAid stand mixer bowl), add your warm water, and sprinkle the yeast onto the surface of the water. Let it sit for 5 minutes until the yeast is bloomed and dissolved. Basically you want to see lots of bubbles that moved around, and you shouldn't see granules of yeast anymore. If the yeast is not dissolved at the end of the 5 minutes, stir it completely to finish dissolving. Tip: If you have a clear glass KitchenAid bowl, it will be easier to see when it is fully dissolved. Also, make sure your yeast is not expired! If you use regular flour instead of bread flour, your crust will be just a little more tough.
In a separate bowl, mix the flour, salt, and sugar and whisk the ingredients together.
Next, add your regular mixing paddle to the mixer. Add in the dry ingredients and the olive oil to the bowl, and mix at a low speed for 1 minute.
Remove your mixing paddle and replace it with the dough hook. If you do not have a stand mixer or a dough hook attachment, then you will need to start kneading old school style! Knead using the dough hook on low to medium speed until the dough is smooth and elastic. This will take about 10 minutes with the stand mixer. If the dough still seems too wet, sprinkle it with a little more flour.
Lightly coat the inside of a large glass or metal bowl with olive oil. Toss the dough into the bowl, and turn the dough until it is nicely coated with oil. Loosely cover the bowl with plastic wrap, and set it in a warm place until it has doubled in size. I recommend either putting it in a (clean) dishwasher near the heating element after it had finished a cycle (don't turn the dishwasher on while the bread is in there!), or you can heat your oven to 150-175 degrees, turn off the oven, and place the bowl into the warm oven.
Using a deep metal baking dish, coat the bottom of the pan with a bit of olive oil. Tip: You do not want to use a glass baking dish because it will make the dough soggy. A metal baking dish will ensure a crisp crust bottom. Take the dough out of the bowl, and spread it around the bottom of the metal baking dish - to the edges - until it largely resembles the shape of your dish. Press the dough all along the bottom of the baking dish to prevent bubbles.
For the actual pizza, preheat your oven to 450 degrees. Coat with your favorite pizza sauce (according to your taste), lightly sprinkle some Italian herbs or Herbs de Provence, spread about 2-4 cups (according to your taste) of mozzarella cheese, and add the Salumi's salami, white onions, pepperoni, and (cooked and cooled) Italian sausage. Bake for 30 minutes, or until the cheese is fully melted and has a few golden spots. The crust should be a nice light golden color.
Enjoy!
Today, a friend asked me for cookware recommendations. I cannot recommend Viking and All-Clad enough! Their stainless steel pans are awesome. I am including a link below in my widget. Don't bother spending the extra money for the copper core pans. Maybe one day I will post a blog about what each pan is purposed for!
Tonight was the Foodportunity event for summer 2012. Of course, good eats were abundant! Tom Douglas is the host of this event, and it was packed and sold out as usual.
This is the second time I've been to this event, though it was my first time as a blogger. This is a great event to get out there to meet your fellow bloggers and food enthusiasts. It's also a great opportunity to get to know some of your local chefs.
The chefs try to bring their A-game here. We have so many great James Beard award winners in this city. They know the crowd loves gourmet food, so they do try to impress! If you aren't familiar with the James Beard award, well, basically it's the Oscar of the food world.
My first time visiting here, I was just a food enthusiast. Now that I'm blogging more, I decided to plug it a little bit at the event. I even got my first tchotchke as an official blogger: a little gift bag from Chocopolis for bloggers! Aww :)
I had the foodportunity to meet the mother of local chef, Wayne Johnson. Wayne participated in an Iron Chef competition, and was a former chef at Andaluca. Now he is the Executive Chef at Ray's Boathouse. I also learned that at the Iron Chef, they give you a list of food items the "secret ingredient" could possibly be in advance. You truly only get one hour, but at least you get to have some brain-storming in advance. I didn't know this about that competition!
As always, it was nice to see one of my favorite local chefs there, Thierry Rautureau. He owns Luc and Rover's here in Seattle. He's such a nice man, and an even more amazing chef! If I were Oprah-rich, I'd try to steal him away as my private chef! Alas, Thierry, don't get your hopes up. There is only one Oprah out there, and I am not her!
I wish my camera phone was working. I would post more photos from the event if it had been.
Who knows, maybe at the next Foodportunity event I will have my own teeny-tiny-small-time award to my name :)
I had such high expectations with the Pink Door restaurant. Nestled in the middle of Pike Place Market, this little Italian restaurant has built up quite a good reputation over the years. People on Yelp rave about the patio and the food. The views might be nice, but it seems they have based their success on their location in the famous market and the effects of flowing wine.
The item on the foodie 100 list is the Gnocchi alla Romana. Translation: Roman Gnocchi. Roman gnocchi ... using gorgonzola cheese ... that originates from a town named Gorgonzola in Northern Italy. *in my best Dr. Evil voice* Riiiiight.
They were the biggest gnocchi I've ever seen in my life! They weren't struck on a gnocchi board, and they had a char on the top and bottom of them. I have never seen gnocchi charred before. As you can see from the picture, they were quite large. All of these traits were the "alla Romana" part, and I can't say I was a fan. I couldn't even finish the dish. As you can see from the picture, there is a lot of gorgonzola sauce. It was too much for me to clean my plate.
There were only 3 gnocchi to the plate. Three was more way more than I could handle! The gorgonzola and walnuts completely over-powered the dish. The older I get, the more I lose a taste for marbled cheeses.
For the best gnocchi in town, skip the Pink Door and head over to Salumi's on Tuesdays during the lunch hour. Wait through the line. It's totally worth it, I promise. Some Tuesdays aren't gnocchi days since it depends on when their aunt can fly out to make the gnocchi fresh that day. They will sell out! They won't serve it to go either, so you should get there as early as you can. You can try calling ahead to see when they will be serving gnocchi next.
All around, I don't get it. I was thoroughly unimpressed. They do have a Yelp check-in deal for a free glass of house wine, so that was a plus. The rigatoni pasta was under-cooked. Their "Mama's meatballs" were also pretty good. Though if I don't say so myself, mine are better! Maybe one of these days I'll get around to posting my meatball recipe.
The only time I'd go back would be to show any out of town guests a nice view of the Puget sound .. if they wanted Italian food .. and free wine. If you can read between the lines, you can probably figure out I won't be going back.
Like I said before, the foodie 100 list seems to have a 2/3 success rate.
I am here to tell you: I agree with the majority of the article.
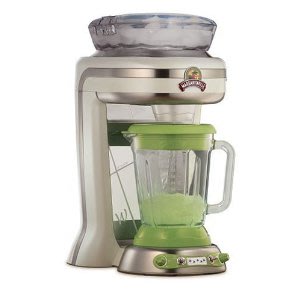
The Margaritaville machine
You know what else works? A blender. Heck, some refrigerators with built-in ice makers will have their own crushed ice setting. The thing is, I know I'll probably buy one of these eventually. For those of you who remember the South Park episode that shamelessly made fun of this machine: yeah, I know... You have my full permission to mock me if/when I ever buy one. I can't justify the expense for now, and I've managed to get this far in life without one. I don't have the space for it in my kitchen either! Sure, it chills and mixes things to a perfect proportion. It is still a ridiculously expensive item, especially if you don't entertain often.
Microwave omelet maker
I guess they marketed this item towards college kids and moms in the 1980s who were amazed they could just microwave breakfast. As truly innovative as microwaves were in the 80s, you should not use them to make eggs .. ever. The result is just plain nasty! The only exception to this rule is sheer desperation (like I said, college kids!). Let's face it, folks - college kids aren't really known for their discerning food palettes, and that is perfectly okay. They might be able to tell you how to cook ramen noodles in some of the most inventive ways using a computer tower case and an iron ala MacGyver style, but do not trust them if they recommend this item to you!
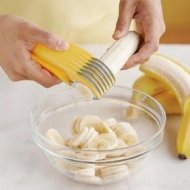
Banana slicer
You know what else slices a banana? A butter knife! Even a spoon will do the job, you twit! It's dull, and I promise it won't hurt more! For years now, mothers everywhere have mastered the art of adding sliced bananas to their children's cereal. Heck, if you want to show some "super powers", take a needle and poke a hole along the seam of a banana peel. Turn the needle to the left and right to cut the banana slices without poking through the banana peel; repeat. Then peel the banana, and voila! You will amaze some gullible kids with your awesome pre-sliced bananas!
Quesadilla maker
I'll admit it: I have one. No, I didn't buy it, I swear! My dude bought it for $3 during a clearance. If you ask me, that should have been hint #1 as to why this item shouldn't been purchased. You know what else makes a great quesadilla? A pan and a knife. I haven't used this thing *ever*. I'm still not sure why we've moved this thing around to so many different houses over the last few years.
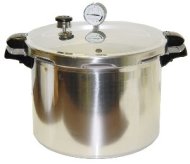
Pressure cooker I had a friend who loved his pressure cooker. He learned a little trick from watching Iron Chef. He would bring it to cookouts and boil bratwursts in them before putting them on the grill for a little char. It prevented them from bursting like they tend to do when they are cooked entirely on the grill. If you cook with tough cuts of meat, sure it might help break them down easier. You should probably practice on tenderizing your meats the old fashioned way - with time - first.
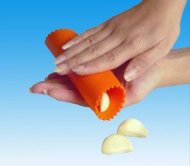
Garlic peeler
The article was spot on with this one. Take your chef's knife, lay it flat on top of the garlic clove (sharp side pointing away from you), and just smash the side of your knife onto the clove. Voila! The skins will be broken up and easier to peel away. Here is another tip for dealing with garlic: either use latex, powder-free gloves, or rub a teaspoon of lemon, lime, or orange juice on your hands to get that garlic smell off of your hands. I keep a little squirt bottle of the lemon or lime juice in my fridge, and it comes in handy for dealing with stinky foods like garlic. If you go with the citric juice method, just be careful if you have any minor nicks or cuts on your hands. Of course if you are unsure if you have any nicks or cuts on your hands, you will figure it out very soon! :)
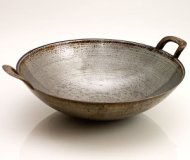
A wok
I tried buying a wok at the grocery store. After one use, it turned black from the creosote, and it rusted. I returned it to the store and decided to try to find a better one. I searched all over, and they all seemed to be made from a very thin metal, and they seemed to be designed for a bunsen burner. Ultimately, I bought a non-stick Breville electric wok. I know most Asian cuisine chefs would shake their head in disgust at the idea of an electric wok, but I love this thing! Wok cooking is supposed to be done in phases. You're supposed to move things and stick them along the upper sides of the wok once you're done prepping them. This gets them away from the heat source while still keeping them warm. You reintroduce them to the rest of the dish once you're ready. With the varying temperature dial, it will take some experimentation before you grow accustomed to it. The Breville wok will take up quite a bit of real estate in your cabinets, so I only recommend it if you have a lot of cabinet space.
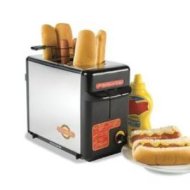
Hot dog cooker
Come on, now! This thing is about as hokey as it gets. The article was spot on with this one too. Toaster ovens are awesome! Personally, I love my Breville Smart Oven. I don't even own a toaster; I just use my toaster oven instead. They sell a compact version of the Breville Smart Oven. If you can, you should use a toaster oven instead of the large oven. It will save a lot of energy, and it won't heat up your house in the already-hot summer months. If
you're not too limited on counter space, I recommend going with a bigger toaster oven in order to cook bigger
things (like chickens as the article recommended) in them. Which brings me to the next and final item...
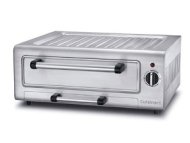
Pizza baker
Once again, I agree with the article! Toaster ovens and ovens will do a much better job, and they are much more versatile! The Breville Smart Oven comes with its own round pizza pan, and they sell a pizza stone that will fit in the oven. You will need to preheat the pizza stone before using it to cook a pizza. I personally don't own or use Breville's pizza stone since I prefer to bake deep dish pizzas. I do have a pizza stone, though it doesn't fit in my Smart Oven. I have used it for frozen pizzas in the past. Now I use my Smart Oven if I'm heating up a frozen pizza. Incidentally, we are going to sell our old toaster oven in our garage sale next weekend. If any of my Seattle-area friends are interested in it, let me know! It still works great too. We just needed a bigger one. It especially comes in very handy when we are making big turkey feasts with multiple side dishes.
A good, long-time friend of mine recently got married. While trying to pick out a wedding gift for her, I found out she was hoping to receive the donut maker she had on her registry. I mentioned this to my dude, and he said "Forget donuts. You should get her an ebelskiver maker!"
"What the heck is an ebelskiver?" I asked.
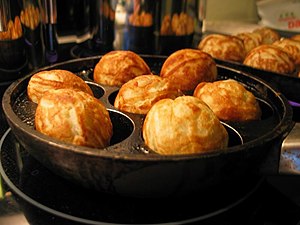
He pulled up a Google search, and explained that it was a Danish puffed pancake, usually filled with fruits, jams, or any other sweet or savory ingredients. How the heck did I never know about these things before?! They are also known as aebelskivers, evelskivers, Æbleskivers, ebleskivers, etc. The pan has special hemispherical indentations. The pan exists in versions for gas and electrical stoves (the latter with a plain bottom). Pans are usually made of cast iron to allow good heat conduction, though they also come in non-stick coating.
I usually like to stick to people's gift registries in order to ensure I give them a gift I know they will enjoy. Once I found out about ebelskivers, all bets were off. I told my friend "I'm going off-registry. You're just going to have to trust me on this one." She said she trusted my taste, so I went with it! As it would turn out, I did very well in selecting the ebelskiver maker! She has some Danish roots in her heritage, and her mother practically grabbed the cookbook out of her hands when she saw the gift! She went on to talk about how her grandmother would make ebelskivers in her cast-iron pan. She said she thought she had a copy of her grandmother's recipe somewhere (hint: I'd love to try it for myself *wink*). I just love it when I hit a home-run with my gifts!
I did some research, and decided I would go with an electric ebelskiver maker since a pan could possibly have issues with uneven cooking. I found one electric ebelskiver maker available at William Sonoma. There I was, standing in the store about a week before my friend's wedding. I had a very serious dilemma: do I get one ebelskiver maker for my friend, or do I get two (one for me, one for her)?
As you probably guessed, I'm weak. I bought two. Not sorry. Yes, I realize I have a serious problem with my kitchen gadget addiction. Though I must say I have discerning taste. I almost got suckered into buying the "ebelskiver turners" for $12.95 at William Sonoma as well. I read some reviews, and several people said chopsticks or bamboo skewers work just fine. They were right!
The next morning, I opted to test out my new toy. I couldn't very well give my friend her gift without being able to provide some sort of help in figuring out how to make them, right?!
I found a batter recipe online, and I decided to make some ebelskivers with blueberries. They were great! Then I decided to make a few with Nutella. They were awesome too. Oh, but then I decided to make some with Nutella *AND* blueberries! It felt like that scene from Ratatouille where Remy eats the strawberry and cheese separately; then .. oh then .. he combines the two and it's just glorious!
My first batch had a few failures. For one, I didn't cook them long enough. I quickly learned that they need to be a nice golden color all the way around, otherwise they will be raw and runny in the center.
I found that adding just about a quarter of a pad of butter - just a
very tiny amount - helps grease the pan. Even if you're using a
non-stick pan, it helps. It's probably vital if you're using a
cast-iron pan.
I also learned that you only need to fill the pan indentations to about a half-inch below the top. This will allow your fillings to fill in that extra space.
When using a semi-liquid ingredient such as jam or Nutella, it's best to put about a raspberry sized dollop on the top of the raw batter right away. You have to act fast before the batter starts to cook too much! Let it sink or use your skewers to cover it up with dough from the sides so the filling will be encased. If you're using fruit with Nutella/jam/etc, then put the fruit in immediately after the other filling so it can help push the filling further into the ebelskiver. For my ebelskivers, I use about 5 blueberries with the raspberry-sized dollop of Nutella. They taste fantastic with a little bit of maple syrup! I am eagerly awaiting trying out some new recipes from the cookbook I bought as well, and I included a link below. You can even make little egg puffs in the ebelskiver maker!
My one and *only* complaint is that the electric ebelskiver only has 9 slots. I sort of wish it had 12 since that would make it easy for dividing between 2, 3, and 4 people. Of course it's easily remediable by just making more! I do enjoy it being a stand alone product. This way I can take it into work if I ever want to make ebelskivers for my coworkers. I have noticed a few "hot spots" with the heating element. It just takes a little time to experiment with filling each slot in an order to ensure an even cook time.
The regular ebelskiver pans run anywhere from $20-30, though they typically only have 7 slots. I included links to some of the Amazon offerings in my widget below. You will notice there is a link for a 12-slot Takoyaki pan. They're basically the same concept in terms of how the pans are made. If you purchase a non-stick pan, make sure you only use wooden turning utensils such as bamboo skewers or chopsticks. You wouldn't want to scratch your ebelskiver pan. The non-stick pans are easy to clean up with a damp cloth, and I am a fan of that!
Of course there are a few other kitchen gadgets that make the ebelskiver-making process very easy. I absolutely LOVE my KitchenAid stand mixer! I don't know how I lived all of those years without one! It is hard to imagine life without it now! If you don't have one (I know, they are NOT cheap!), Black Friday and Cyber Monday are usually the best time to purchase these. Trust me when I say this: do not go off-brand and get a cheaper brand of stand mixer. You won't be able to use the same variety of attachments with them. KitchenAid makes a vastly superior array of products. Costco also usually has some good deals as well, though usually it's for the larger one with the bowl lift. I purchased it in the past, and I found it to be kind of a pain to get it locked into place. Hint: guys, this would make a great present for your wives!
I still use my old electric hand-mixer on occasion, especially for making ebelskivers. Why? Sometimes you need to whip up egg whites or whipped cream separately. It is a bit of a pain to have to clean KitchenAid attachments and bowls (if you have an extra bowl - something I intend to purchase one of these days) between batters - only to combine the two batters again later. So if any of you find yourself upgrading to a KitchenAid stand mixer, do not get rid of your old electric-hand mixer thinking you won't ever need it again!
I also recommend a gadget upgrade for every KitchenAid stand mixer owner. A couple of years ago, they started selling a paddle attachment with a rubber scraper built in on one side. It has the same base as the regular paddle attachment that comes with each KitchenAid stand mixer. It works really well at incorporating as much of the batter ingredients as possible. Depending on how full your bowl is and which speed setting you choose, you will notice a tiny line of ingredients along the top edge where the paddle stops. It's almost negligible compared to how much gets left behind with the old paddle attachment. It costs about an extra $20, but it is definitely worth the extra cost. I included a link to it in my widget below. I have seen larger ones available for the larger stand mixers, though I do not see them on Amazon at this point in time. This scraper paddle should be your very first attachment upgrade!
One last tip on KitchenAid mixers: the steel blades aren't really dishwasher safe. They will change colors and lose their sheen if you put them in your dishwasher. I've never had that issue with putting the enamel coated blades in the dishwasher - including the scraper paddle.
I have tons of other KitchenAid attachments, so stay tuned for more reviews on those!
Once a year, Pike Place Market holds their annual Sunset Supper fundraising event. All proceeds support the work of the Pike Market Medical Clinic, Senior Center, Child Care & Preschool and Food Bank– vital services utilized by thousands of Seattle’s low-income and elderly residents. The Pike Place Market zoning regulates that the vendors all have to sell a certain percentage of their items at very affordable rates to accomodate the local residents within the zone, so their prices are not all "incredibly overpriced" like one might think. The Pike Place Market is definitely one of Seattle's greatest treasures, and they absolutely deserve your support!
This year, the Sunset Supper falls on Friday, August 17th, 2012. It's usually held on a Friday. Trust me when I say this, folks: this is not an event to be missed! It is absolutely my favorite item on the Seattle Foodie 100 list!
At this event, they have about 60+ food/wine/beer vendors with samples galore.
If you leave this event feeling hungry: you didn't do it right.
If you leave this thing feeling sober: you didn't do it right, though that's probably okay...
If you leave this thing without a food baby in your stomach: you didn't do it right, though maybe that's a good thing too...
You really need to bring a designated driver and your fat pants to this event. I wore an a-line dress, and I left this event with a noticeable food baby! Even my dude said "Wow, I am not gonna lie, babe... it *is* noticeable." I wasn't even sorry! As one of my good friends from Texas would say: you will leave this place feeling as happy as a stuffed tick at a nudist camp!
Some of the best of the best restaurants in all of Seattle participate in this event. If you don't have the budget or time to get out and try all of these different places, this is your big opportunity to have little samples from everybody. This way you get to discover the establishments you want to visit again!
Be sure to bring about $10 cash in order to "upgrade" your plate to one of the plastic plates with a wine notch cut out in it. They didn't charge $10 last year, but it's always good to have a little bit of extra cash in case they have similar additional offerings . It will make your evening so much easier to avoid having your hands so full! Also, if you really like some of the wines, write them down. You won't remember them the next day ;) Though you don't want to completely blow away your palate by trying too many wines. Consuming that many tannins will work a number on your tastebuds.
Also, be sure to bring your CC to this event for 2 reasons:
1) They offer little spin the wheel raffles, and you are guaranteed to get at least your money back - usually doubled - in certificates and prizes. It goes to a good cause, so why not? If you get a certificate you don't want, ask someone in line behind you if they would like to trade.
2) Last year they also offered Seattle Celebrated Chefs cookbooks if you register one of your credit cards to the Dine Around Seattle program. The program is for participating restaurants to donate a small portion (somewhere between 1-2% if I recall correctly) of their proceeds to a great cause. They had some of the published chefs onsite to autograph the book. I'm not sure if they're going to do the same thing again this year, though I'd imagine they will.
I do recommend going at the Patron level if you can. I heard a rumor that they were going to offer a gift bag of some sort, though I haven't been able to substantiate that rumor. If you ask me, it's worth the money for the extra 1 hour of non-cattle-call selecting of food items. It gets super crowded when they let everyone into the event. Sure, people might give you the "stank" eye for being there ahead of everybody, but you earned it with your financial support. Enjoy it! Personally, I wouldn't recommend going the "reserved" route over the "general admission" since you will be able to find a place to enjoy your food in solitude. Or really, you just might eat the sample as they are given to you.
Make sure you get your tickets before 7/16! The prices will go up significantly if you wait too long! Also, don't count on getting last minute tickets. This event usually sells out, so now you have two reasons to get tickets in advance.
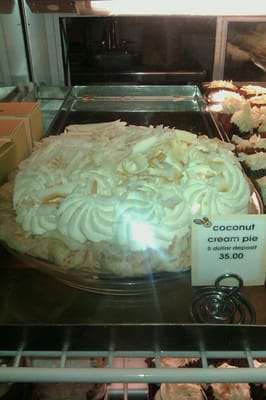
Long before I even knew of this Foodie 100 list's existence, the very first item I ever had from the Foodie 100 list was Tom Douglas' Triple Coconut Cream Pie. My grandma used to make a coconut cream pie that was pretty good. I'm sorry grandma, but Tom's got you trumped!
I first tried this back in September 2008 during my very first visit to Seattle. Chance took me to the Dahlia Bakery, and he ordered 2 slices of the
pie to go. I'm very glad he ordered 2 because I probably would've stabbed him
with my plastic fork to get the last few bites. Since it was in the
early part of our relationship, that could have made things awkward... I licked that cardboard after I was done, and I wasn't even sorry!
I get that coconut is one of those polarizing foods - people either love it or hate it. Most people who hate it hate it for the texture. Up until the first time I came to Seattle, I had never even seen the wide coconut flakes. They always just sold shredded coconut at the stores in Texas, so I guess I could understand why people wouldn't like the coconut shreds getting stuck in their teeth. This pie uses mostly coconut flakes, and only some shreds in the actual filling, so that would negate most of the arguments against coconut.
In all seriousness, this triple coconut cream pie...
it's just so.. so.. beautiful. It's like Mary Poppins. It's
practically perfect in every way. It has most definitely earned its
spot on the Seattle Foodie 100 list!
They bake coconut shreds into the crust. They top it with coconut flakes and white chocolate flakes. It's a very high pie, and it's just delicious! They sell it in little bites if you just want a little taste because you're diabetic or you hate coconut. They sell it by the slice, a half-pie, and a full pie. It is pretty expensive to buy the full pie, but it's SO delicious!
Even if you're not after this pie, you can still get other
things in this bakery that will still give you that cooking show O-face
(except this time it would be genuine). If you see something that looks
tasty and appealing to your senses, get it. I'd almost guarantee that
it will live up to every fan-tasty filled thought you would have about
it.
Plus this bakery is 1/3 of the leg in the Bermseada triangle
(get it? Berm-SEA-da?) of my biggest weak points: gourmet pizza at Serious Pie, crab cakes and
cocktails at Dahlia Lounge, and the triple coconut cream pie here. Oh,
Tom. You complete me.
It's dangerous territory. You've been
warned. Even so, it's worth the venture. My significant other drove 4
hours to Seattle to buy me a whole pie for my birthday 2 years ago. His
sacrifice was greatly appreciated, and I did not let one single crumb of
that pie go to waste.
Tom does publish his recipe, so if you're not in Seattle and want to give it a go: have fun! Another food blogger put together a blog when she made Tom's recipe. I've personally never tried it (though I've threatened to many times), so I really can't help you out if you have issues with it. It does look a bit complicated.
I will say one thing: I see two ways to greatly increase the aesthetics and ease of making this pie. There is a simple and cheap solution to forming pie crusts available on Amazon. I seriously don't know how someone didn't come up with this idea years ago!
It's called a Pie Crust Bag. Basically it's a clear round bag with a zipper along the side. You just lightly flour it, close the zipper up, shake, toss your ball of crust dough in the center, zip, and roll it out until the dough fills up to the edges. That's it! They sell them in 11" and 14" sizes. I have both, though I've only used the 11" one since I only have 9 inch pie dishes. I don't know too many people who have 12" pie dishes (aside from Martha Stewart). So if you're unsure of your pie dish size, go with the 11" one. I have only found two down sides to these things:
1) Cleanup is kind of a pain since the butter, milk, and shortening in pie crust tend to get caked on the plastic. Though it is much less of a pain than cleaning up after rolling out a crust the old-fashioned way!
2) Since the zipper doesn't fold on one side of the package, the edge of the crust will have a small line in it. This isn't really a huge deal if you crimp my pie crust with a fork.
I also recommend getting a silicon pie crust shield to keep it from burning the edge of the crust. The one I bought from Amazon worked really, really well.
Of course every pie-maker needs pie beads. Sure, you can use pinto beans to hold down your pie. Though really, if you're going to make lots of pies, just get the beads! I put down a round circle of either parchment paper or aluminum
foil on the bottom of the pie crust before putting the beads down. I prefer using aluminum foil because I can press it on the bottom of the pie pan and form a nice round shape. I then cut the foil around that circle, and voila! When I'm done, I run the beads through a metal colander to cool them off before I put them back in a bag.
I even included a handy little link for finding these items below. They're very affordable. If you mouse over the links, I included some helpful comments for each item. Enjoy!